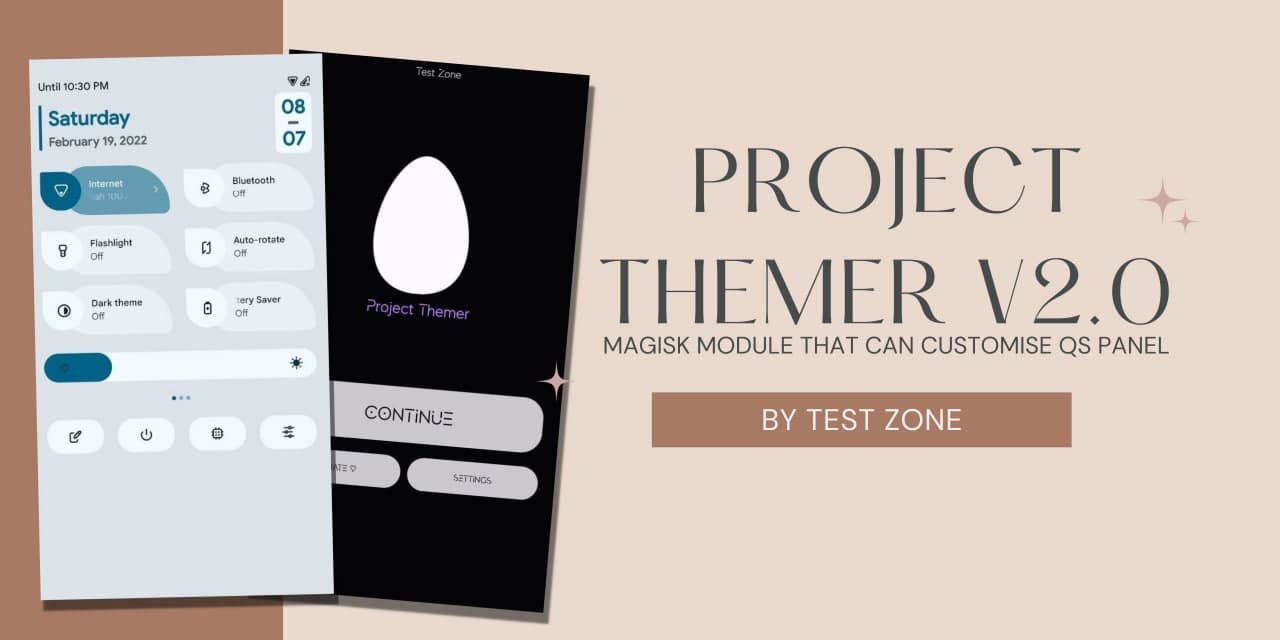
Android 12 is the latest stable Android OS for Smartphones and other Android Based devices. It provides a new UI and some new features. Android 12 also brings a new redesigned QS Panel. Well, Most people prefer Android 11’s QS Panel over Android 12. Well, recently I found an interesting apk that can customize your QS Panel in Android 12.
Android 12 Quick Settings Panel is different from Android 11. You will see two QS Tiles in one row that looks interesting for some people and weird for some people. I recently found an android app named Project Themer that lets you change or Customize your QS Panel in Android 12.
With the Project Themer app, you can fully customize your QS Panel. you can change QS Tiles, Change QS Tiles size and shape, and much more. To run this app you need to root your smartphone with magisk. If you have already rooted your phone, let more forward or you can easily install magisk in your phone with this guide.
How to Customize your QS Panel in Android 12?
1 . First of all, Download and Install the Project Theme apk from here.
2. Open the Project Theme app and It will ask you to download Addon Module for Magisk.
3. Download that magisk module and Flash it via Magisk.
4. Reboot your Phone and Open the app again.
5. Give root access to the app.
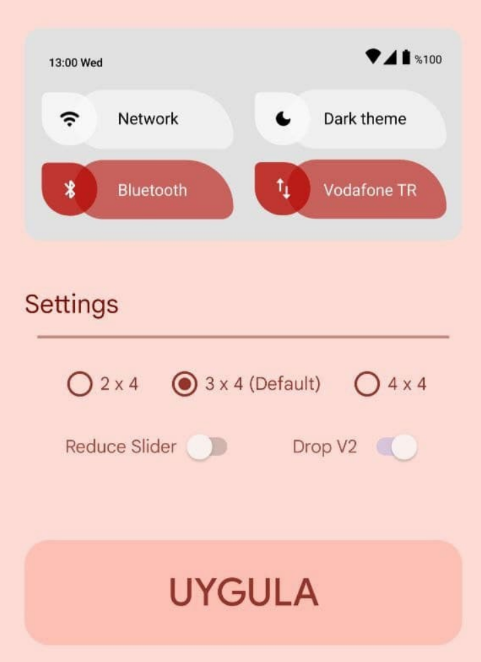
6. Now, You will be able to customize your QS Panel in Android 12.
Credits – Thanks to Test Zone for making this app and module
Thanks for reading this article. If you found this article helpful and interesting, let me know in the comments section and also share it with your friends. For more interesting android hacks and updates, join our Telegram Channel.